Tour
The dashboard of a shpyrd workspace, page by page.
Every workspace has a dashboard at its own address: on shpyrd cloud, https://<workspace>.shpyrd.cloud; on a cluster you run, the address you gave it. These screenshots show a sample workspace, Acme, signed in as its owner. Everything below is also available from the CLI, which is how your agent does it.
Signing in
The workspace's login page, at its own address. People sign in with their shpyrd account, or with your company's sign-in once the workspace has one - Google Workspace, Microsoft Entra, GitHub or any OpenID Connect provider - and the page carries the workspace's logo and colour. The CLI signs in through the same page: shpyrd login --url https://acme.shpyrd.cloud opens it in the browser.
The launcher
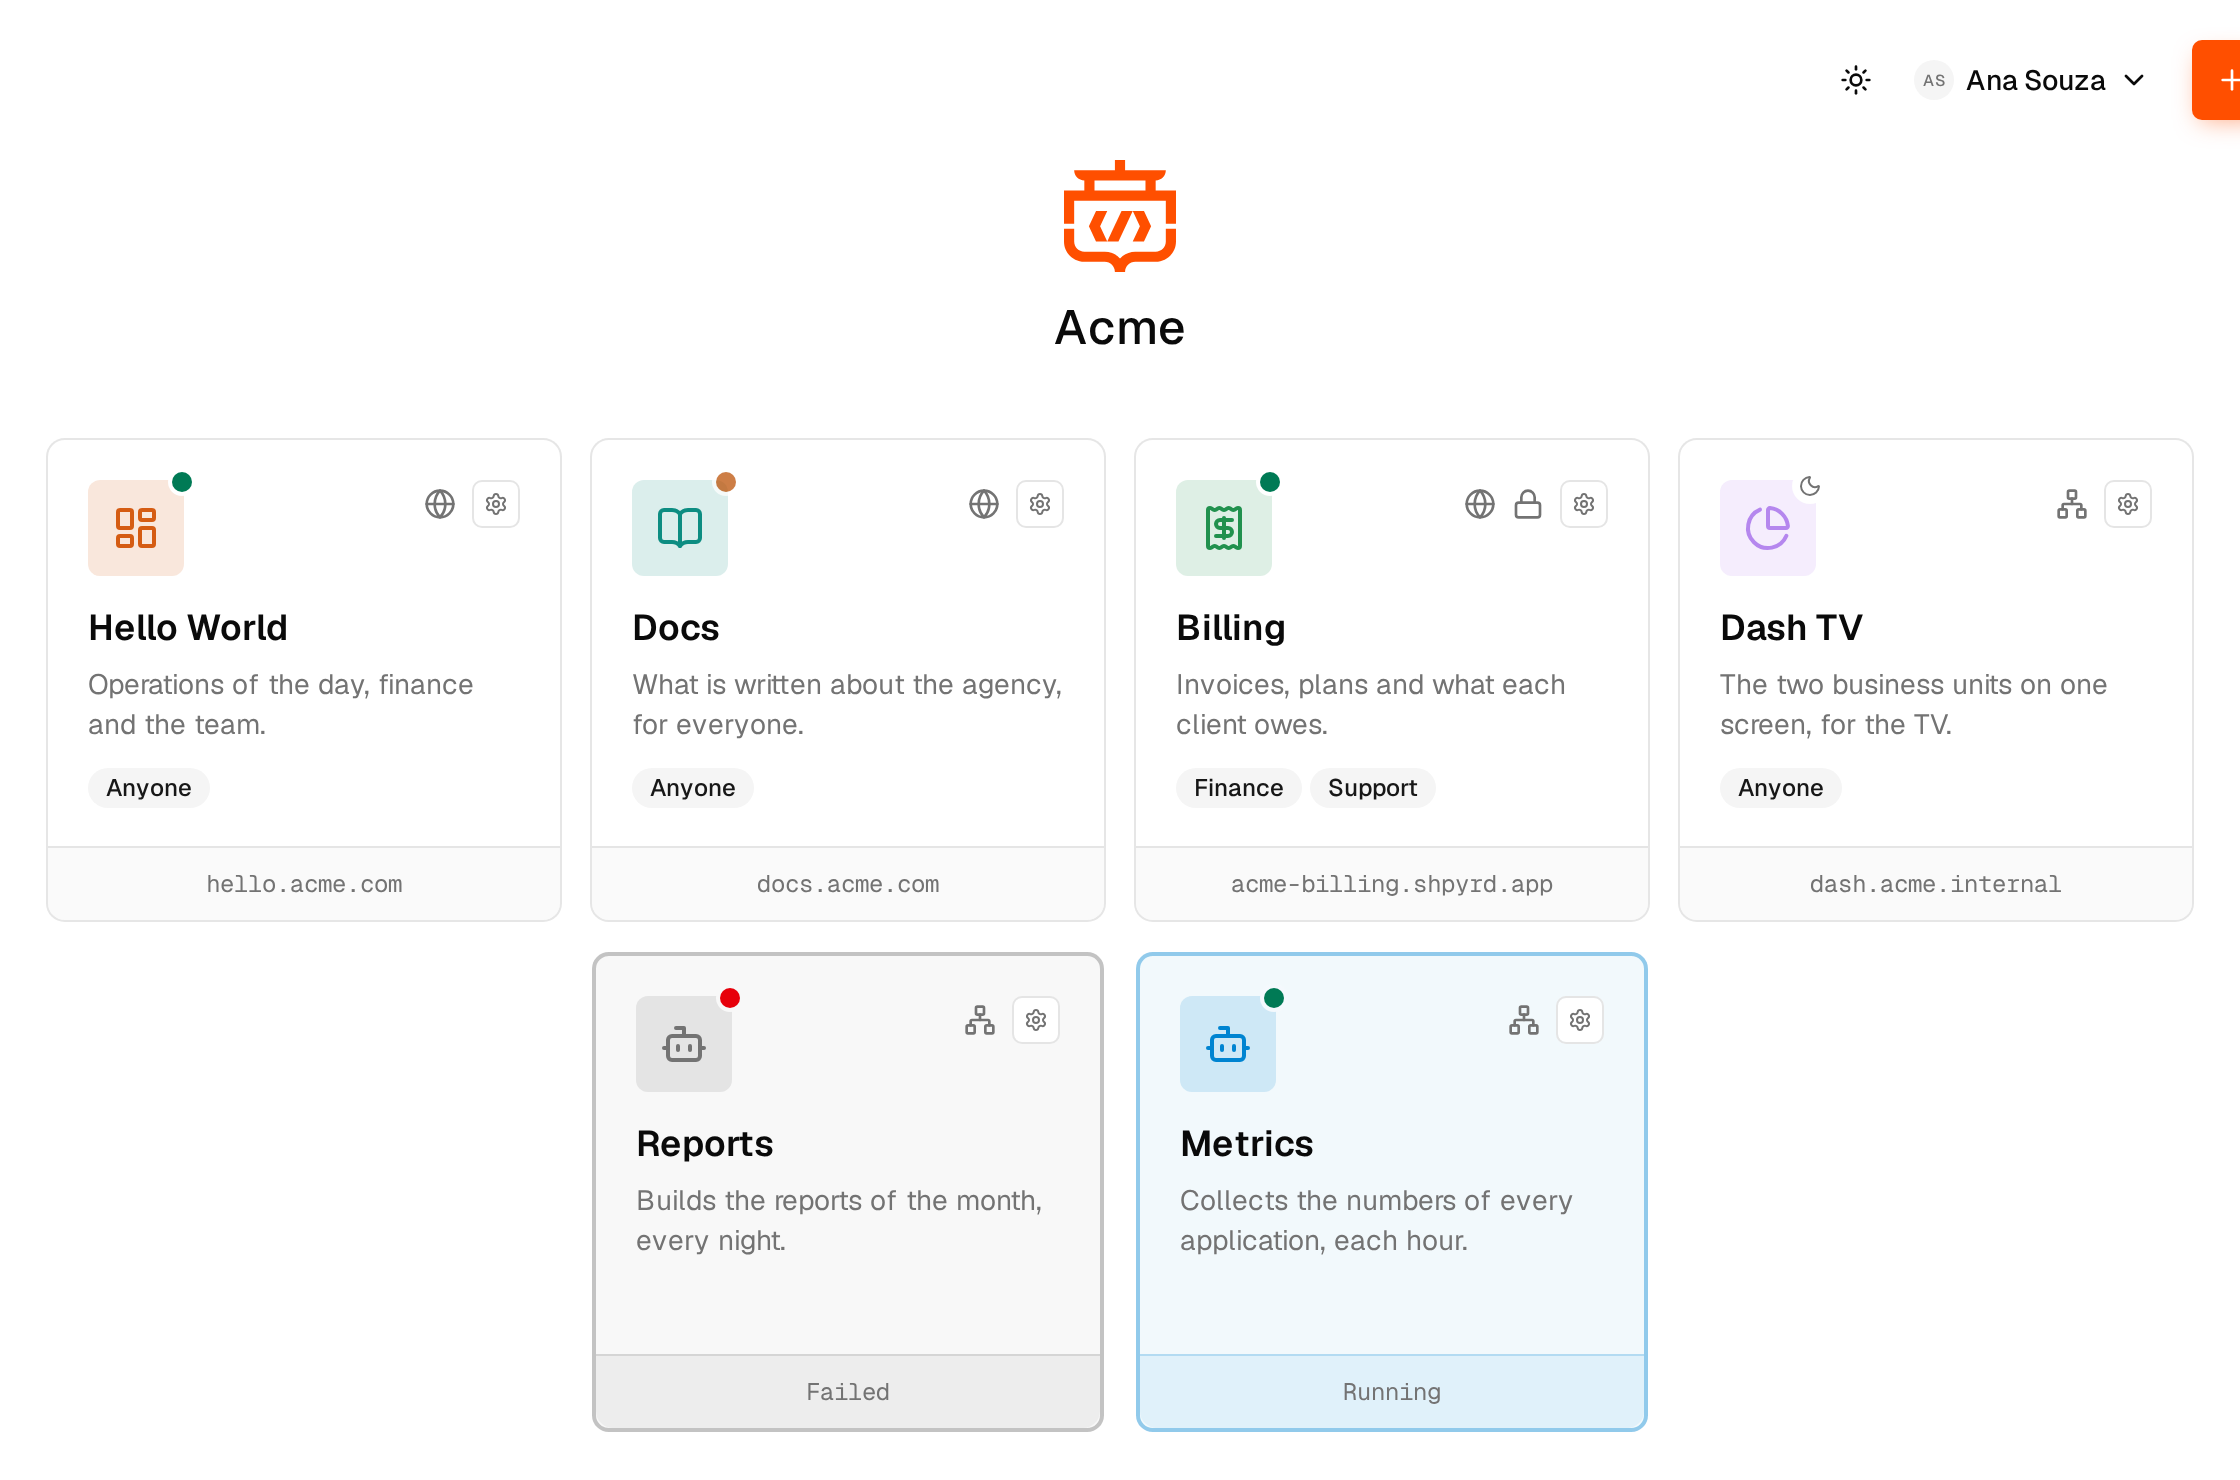
Where everyone lands after signing in: a card for each app they may open, each with its one-line description, its address and who may open it. A dot gives its state: running, deploying, failed or asleep. People who only use apps see nothing else. People who build open a project from the gear on its card, and create one with +.
A project
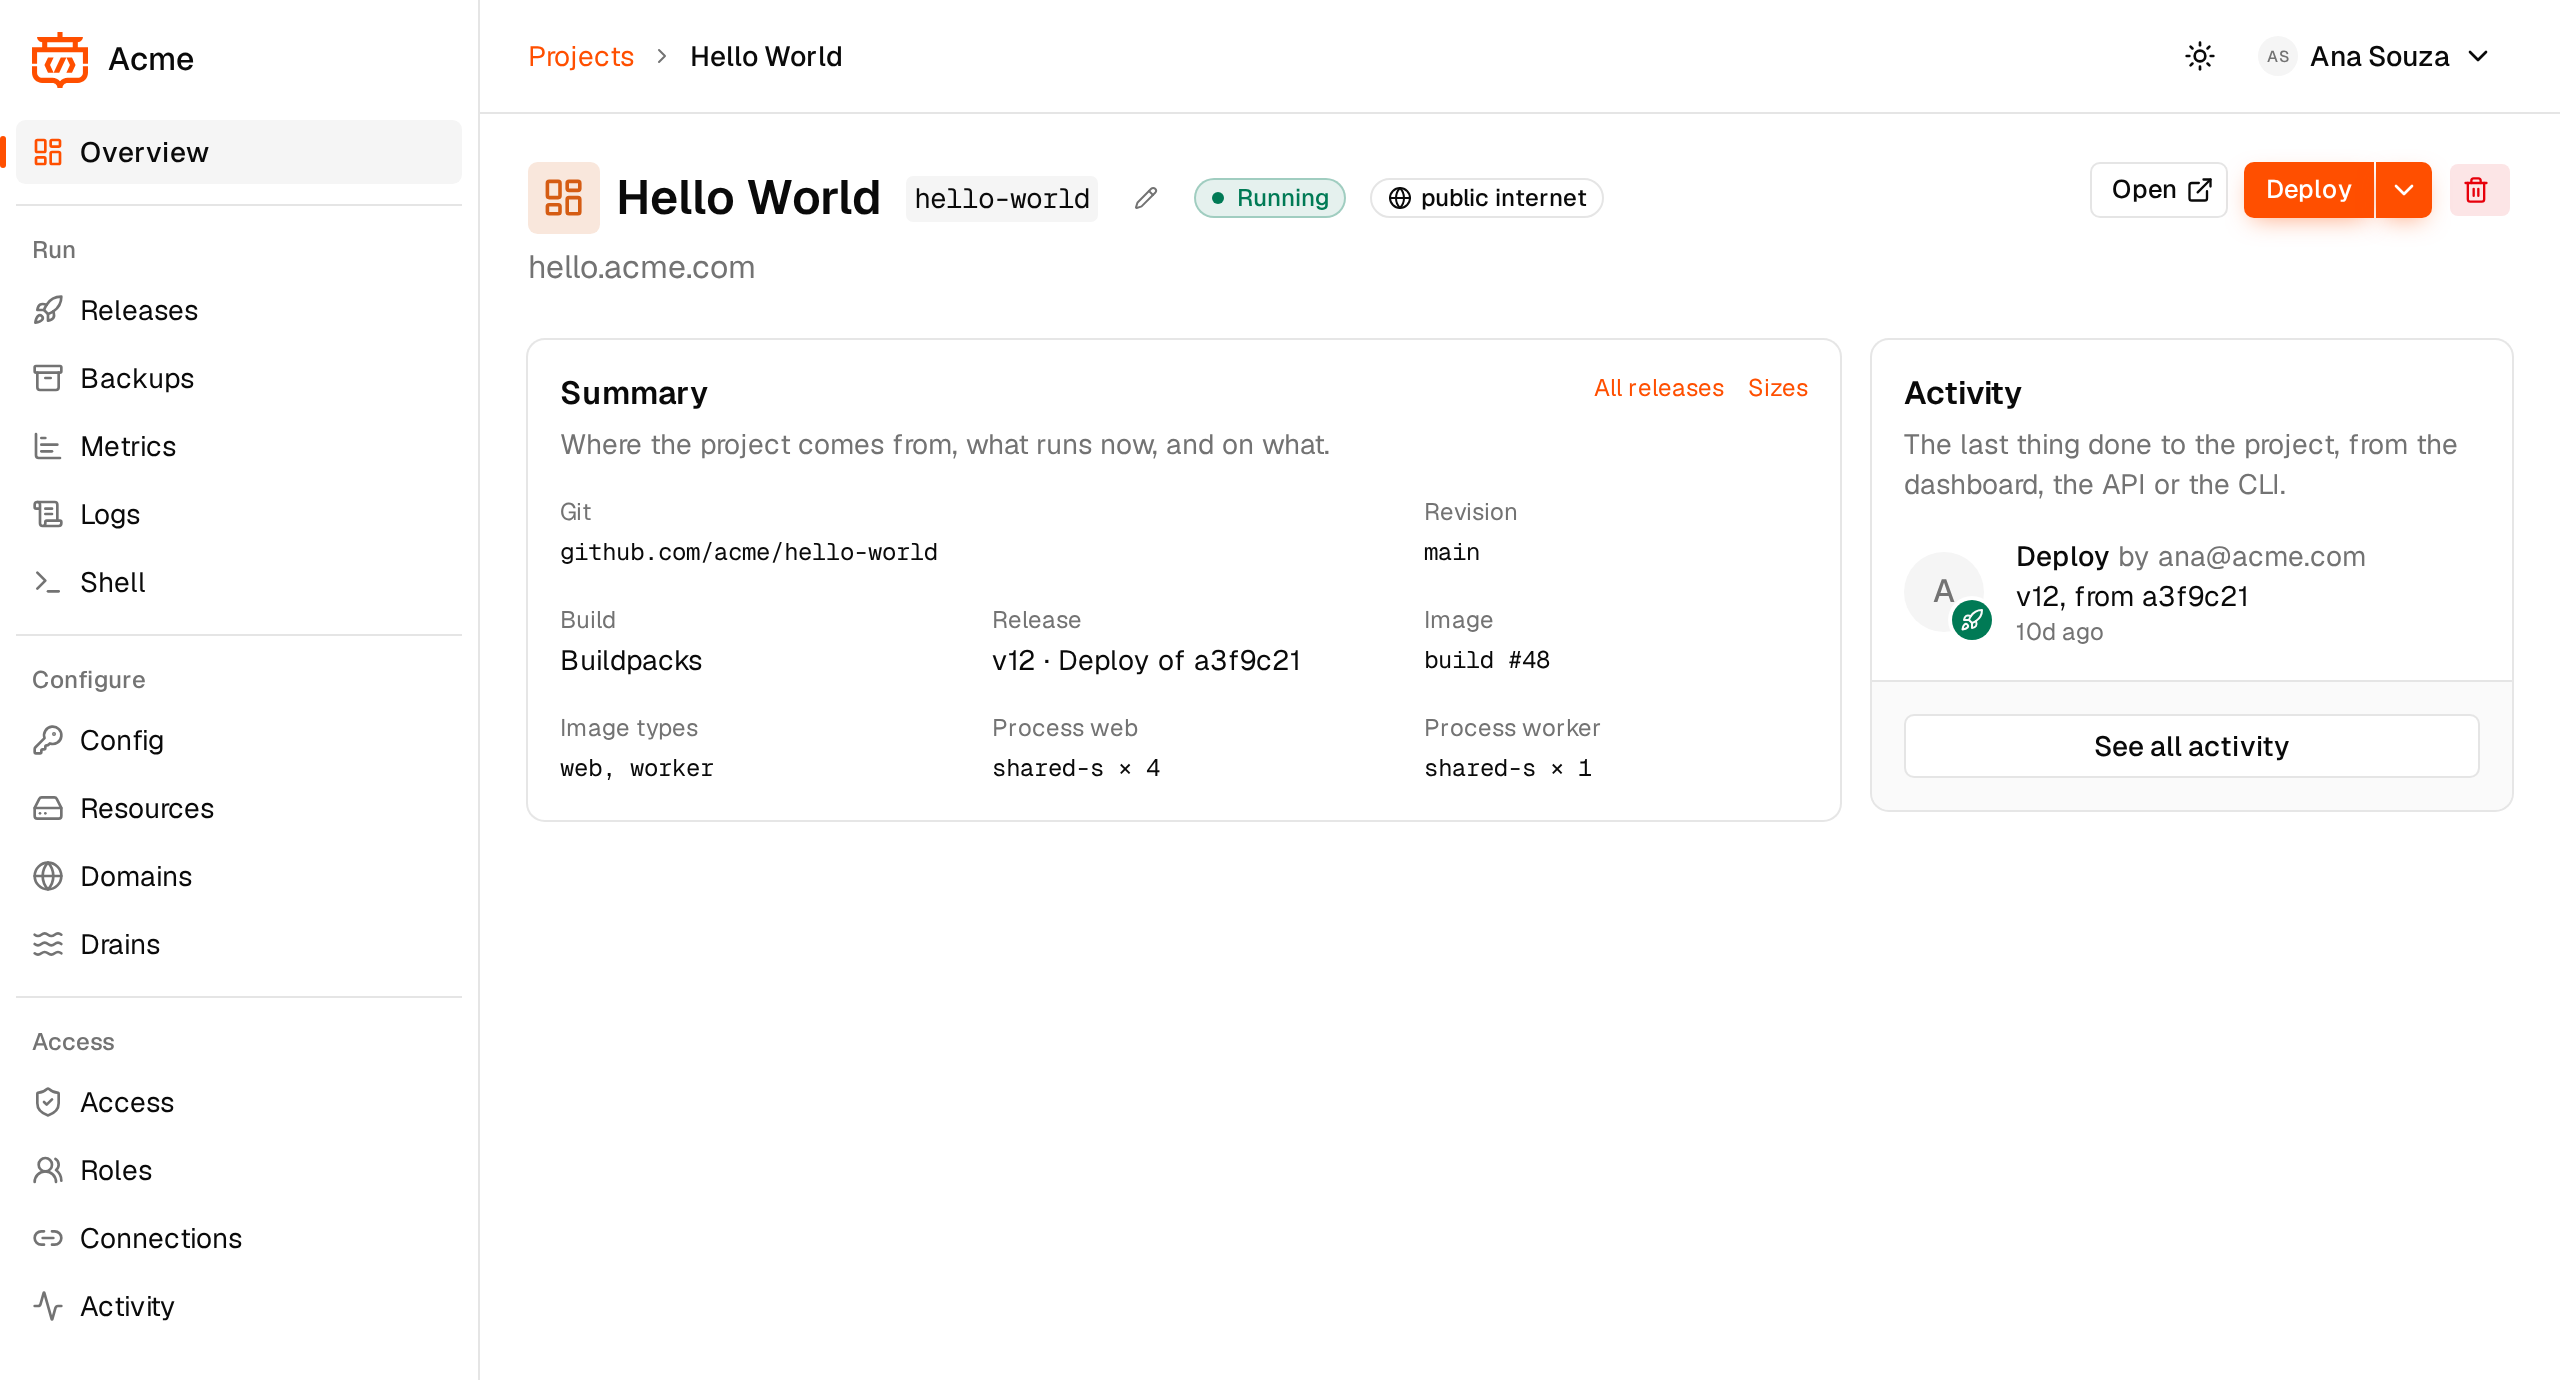
A project is what you deploy to: a name, an address, config vars and a set of resources. On shpyrd cloud its app answers at https://<workspace>-<slug>.shpyrd.app, or at a domain of your own. Its pages are listed down the side, in three groups:
- Run: Releases, Backups, Metrics, Logs and Shell.
- Configure: Config, Resources, Domains and Drains.
- Access: Access, Roles, Connections and Activity.
The Overview sums it up: where the code comes from, how it is built, the current release, and each process with its size and instances. Beside it, the last thing done to the project. Open, Deploy and delete are at the top of every page.
Resources and attachments
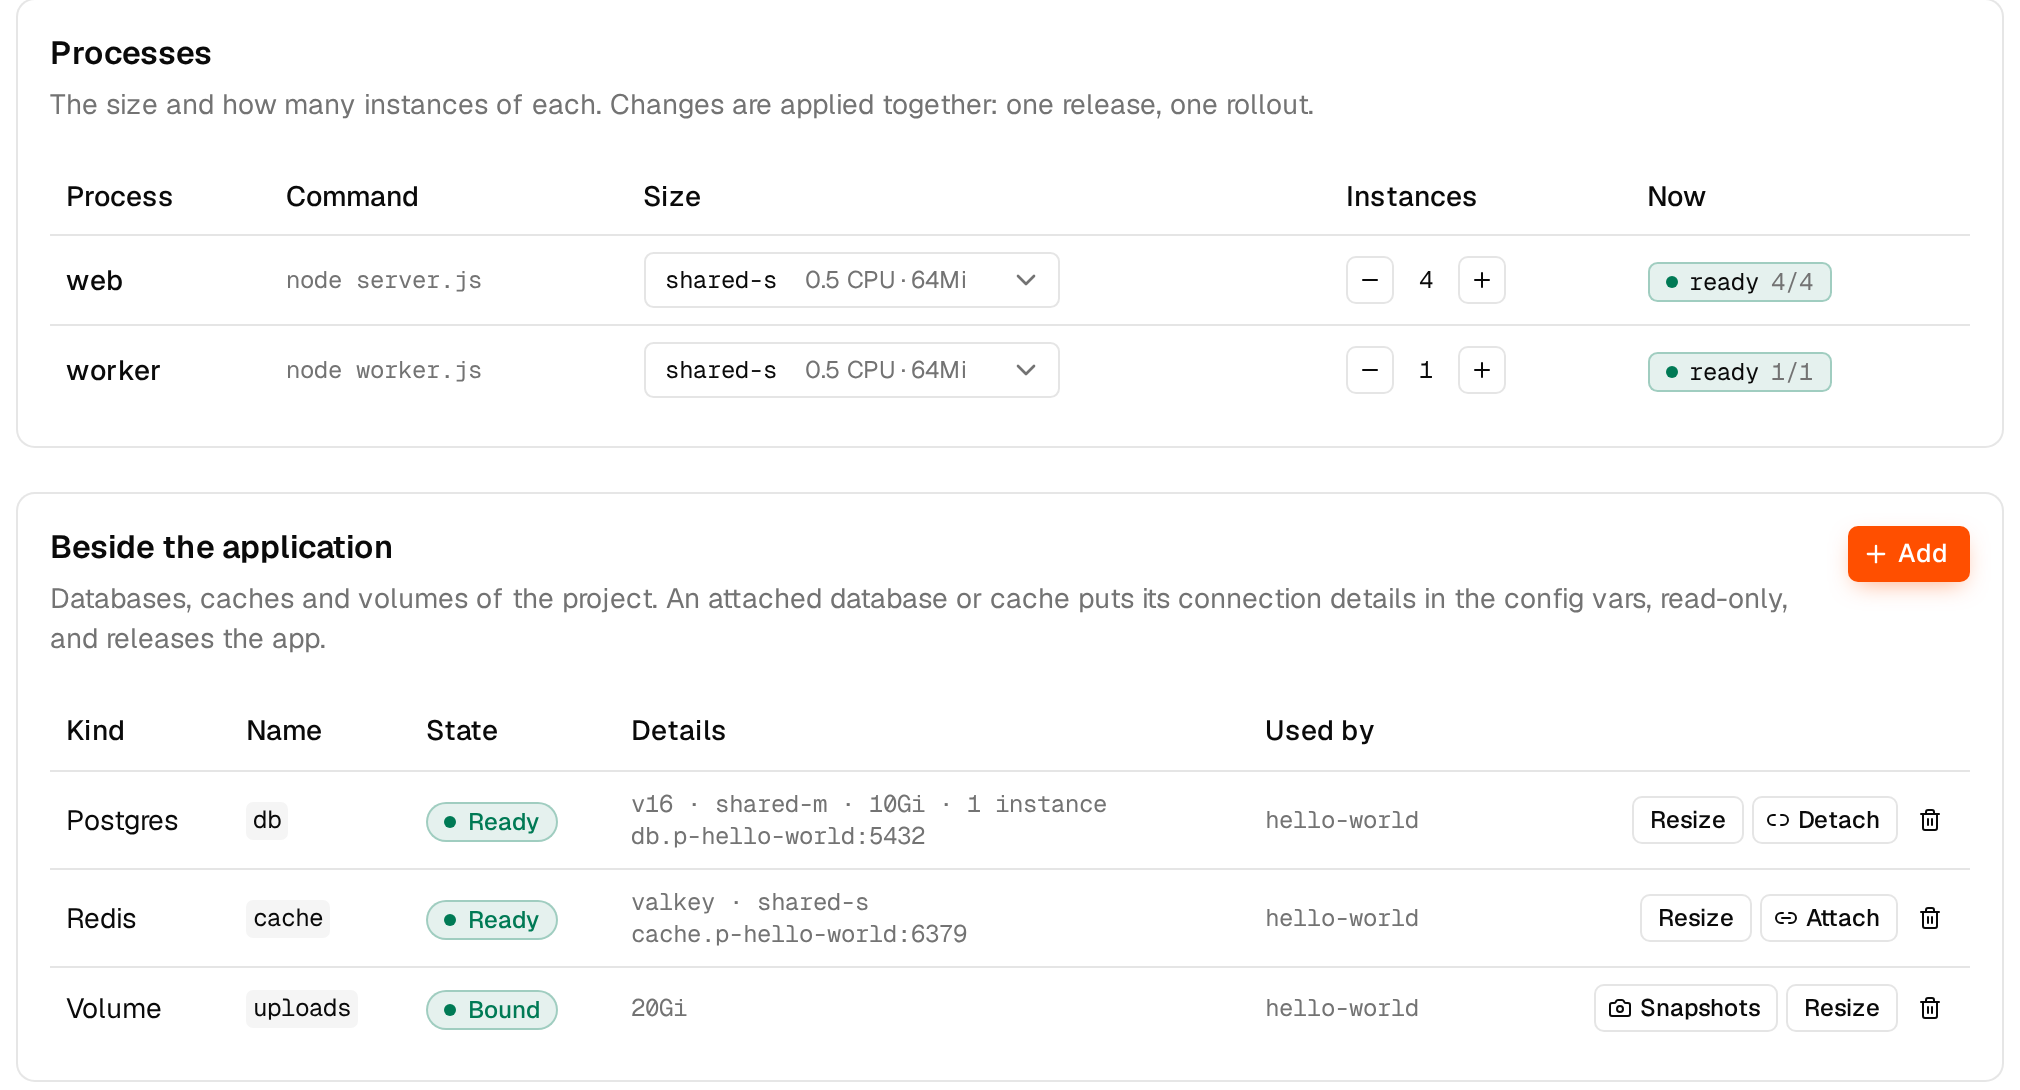
Resources holds the processes and what runs beside them. Each process has a size and a number of instances; changes are applied together, as one release. Below, the databases, caches and volumes of the project, with their state, endpoint and what uses them. An attached database or cache puts its connection details in the config vars, as DATABASE_* and REDIS_*. Attach and Detach each make a release; Add creates a volume, a database or a cache. A volume has its Snapshots.
Releases and rollback
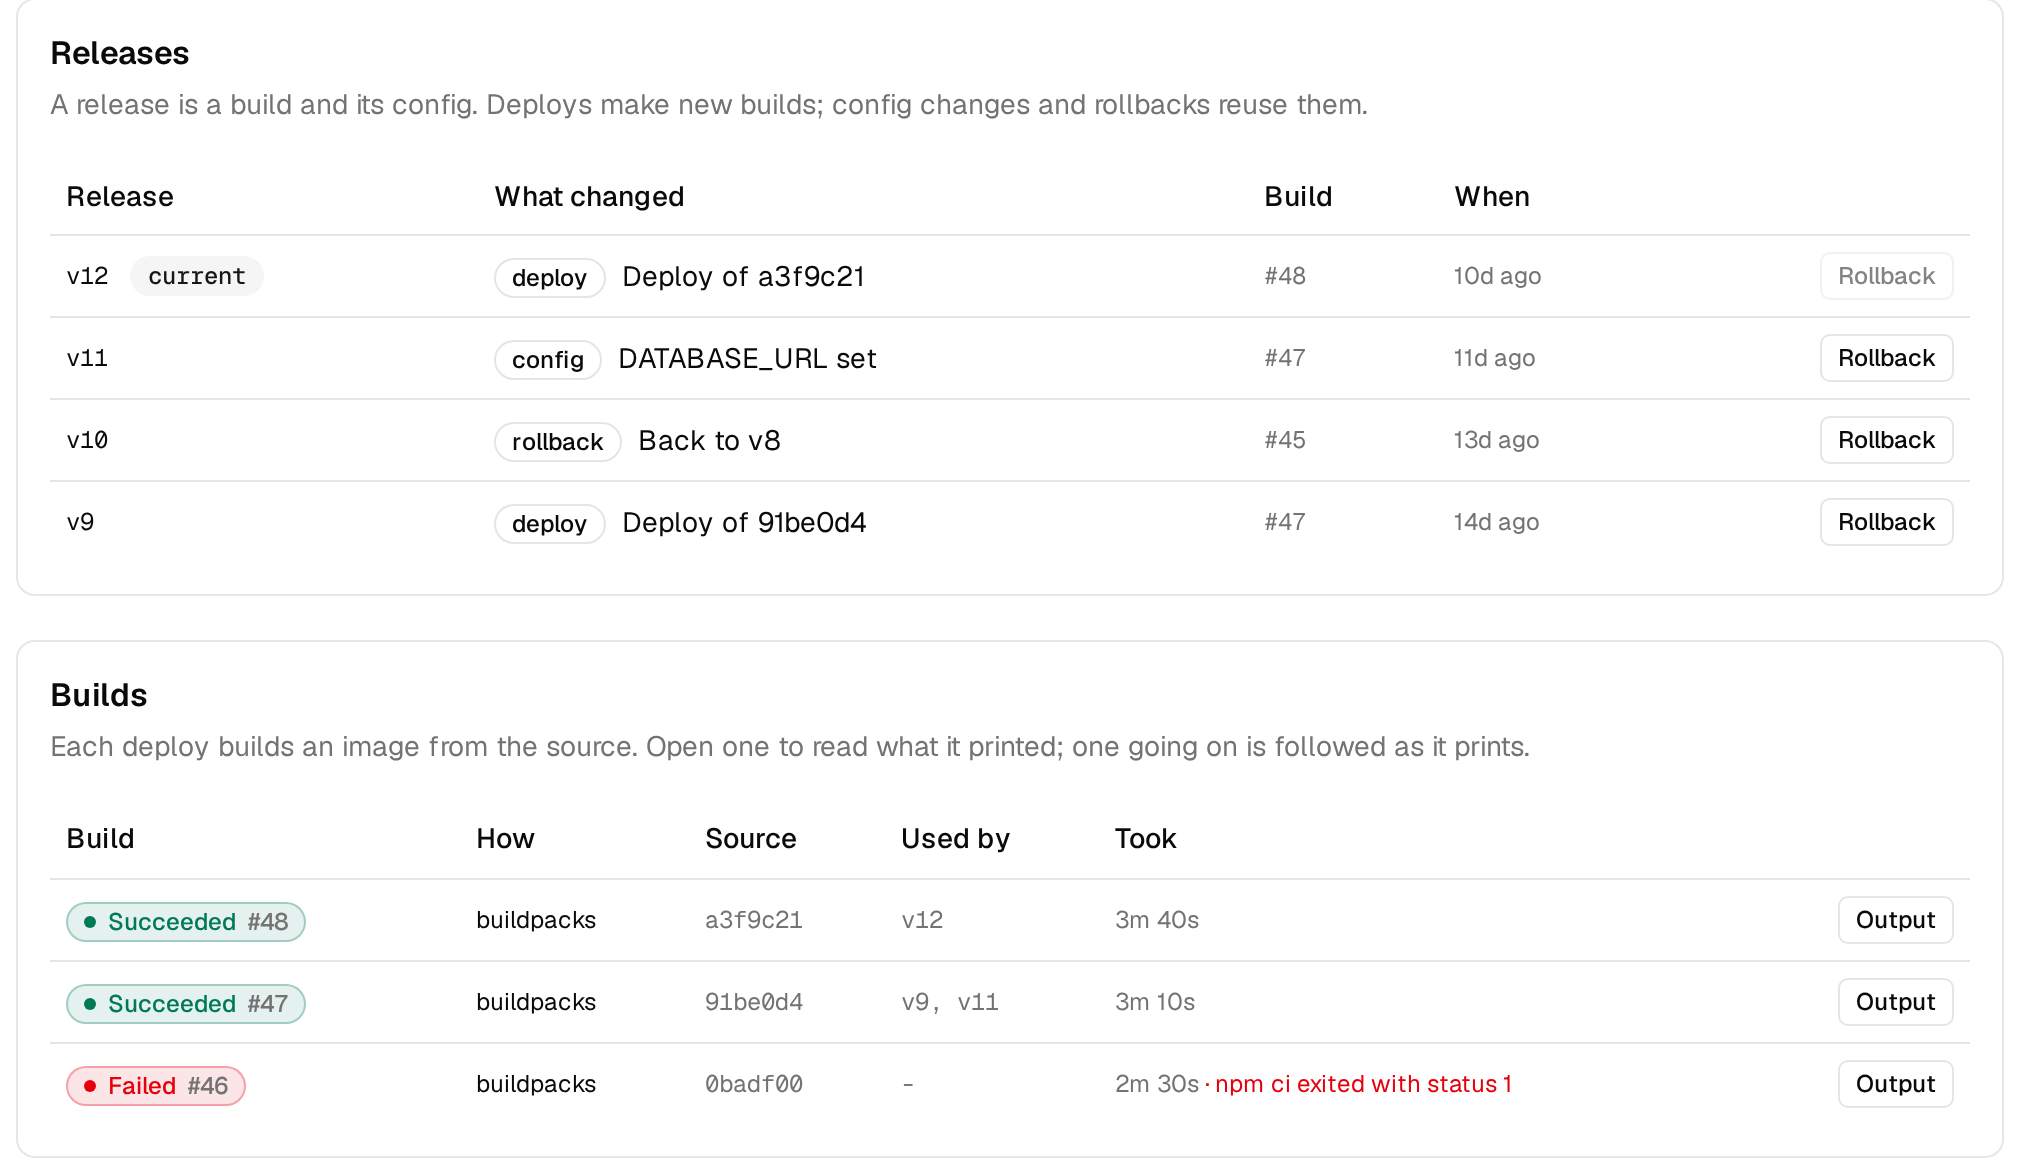
A release is a build plus the config in effect. Deploys make new builds; config changes and rollbacks reuse them. Rollback re-releases an earlier build together with its config vars, sizes and attachments. Below, the builds: how each was made, from which source, which releases use it and how long it took. Output shows what a build printed; one going on is followed as it prints.
Access and roles
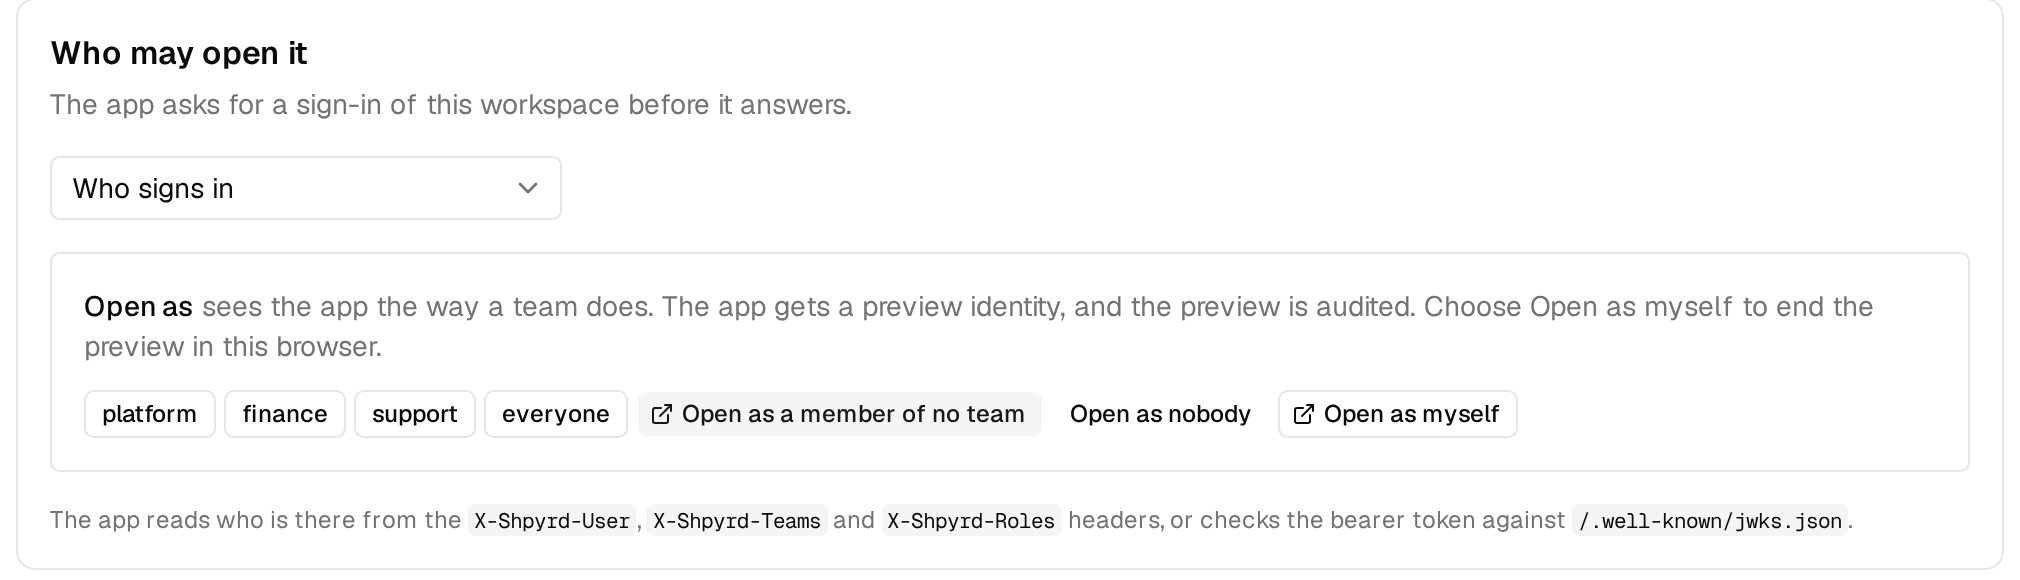
Access: who may open the app. Sign-in required (the default), anyone, or anyone with signed-in visitors identified. Open as opens the app in a new tab as one of your teams, or as nobody, so you see what your users see.
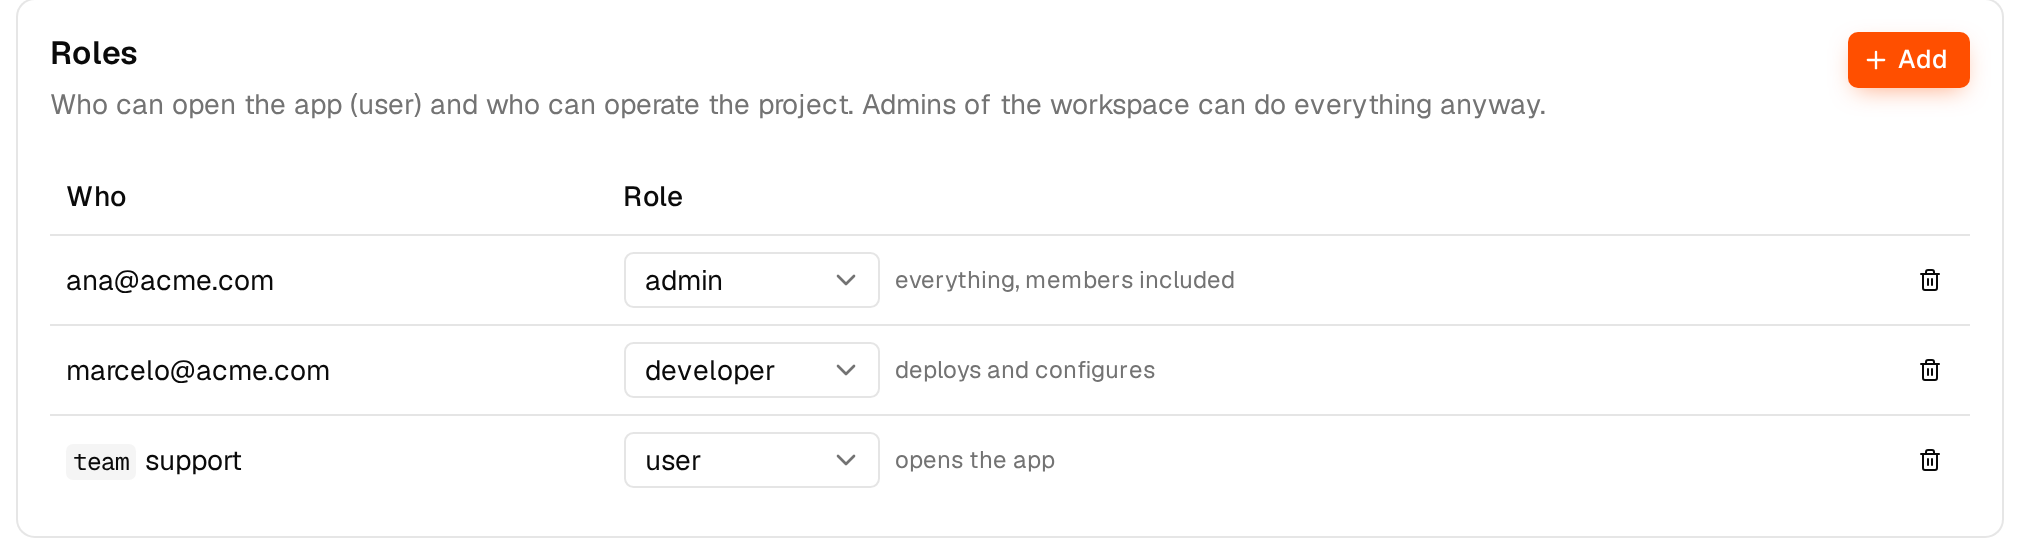
Roles on the project - reader, user, viewer, developer, admin - granted to people or teams. Connections lists the other projects that may call this one inside the cluster.
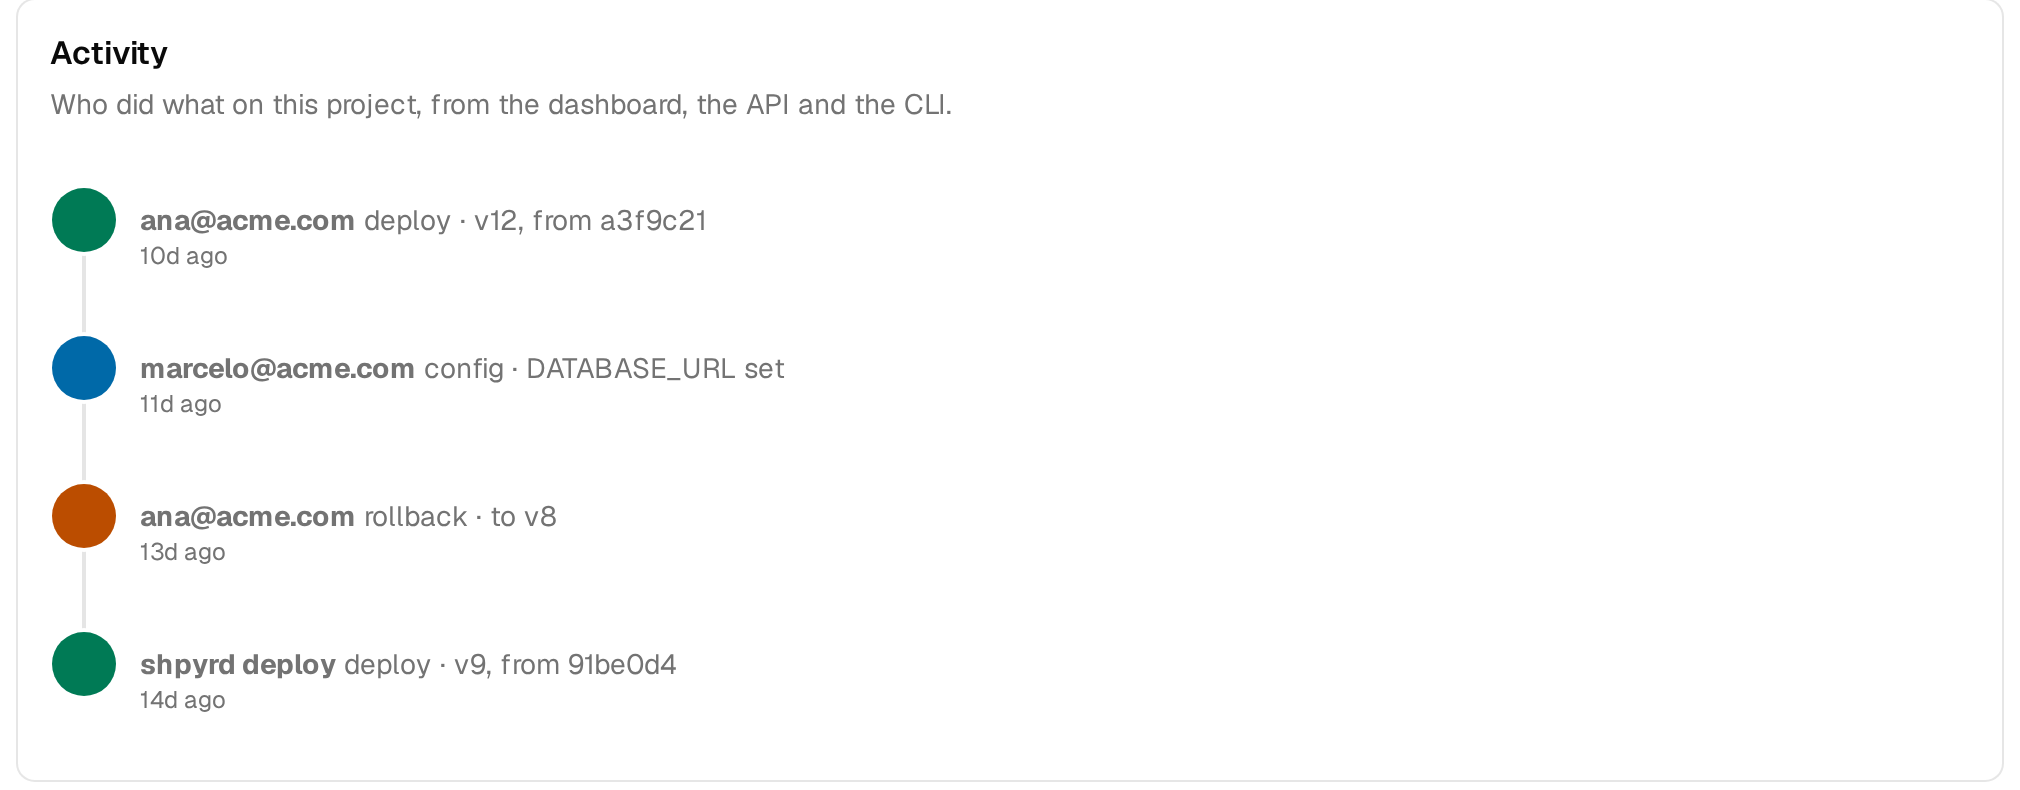
Activity lists who did what, from the dashboard, the API, the CLI or an agent.
Deploying
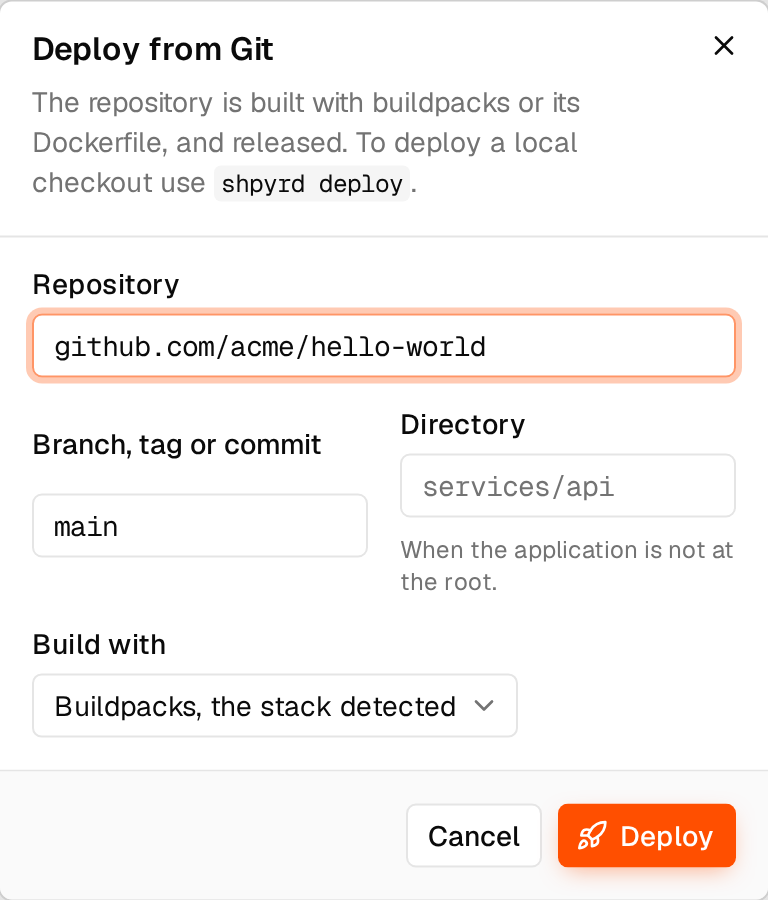
Deploy builds a Git repository with buildpacks or its Dockerfile, and releases it. Local checkouts deploy with shpyrd deploy. While a build runs, its output streams on Releases; when instances fail, the project says why and offers a rollback.
Metrics
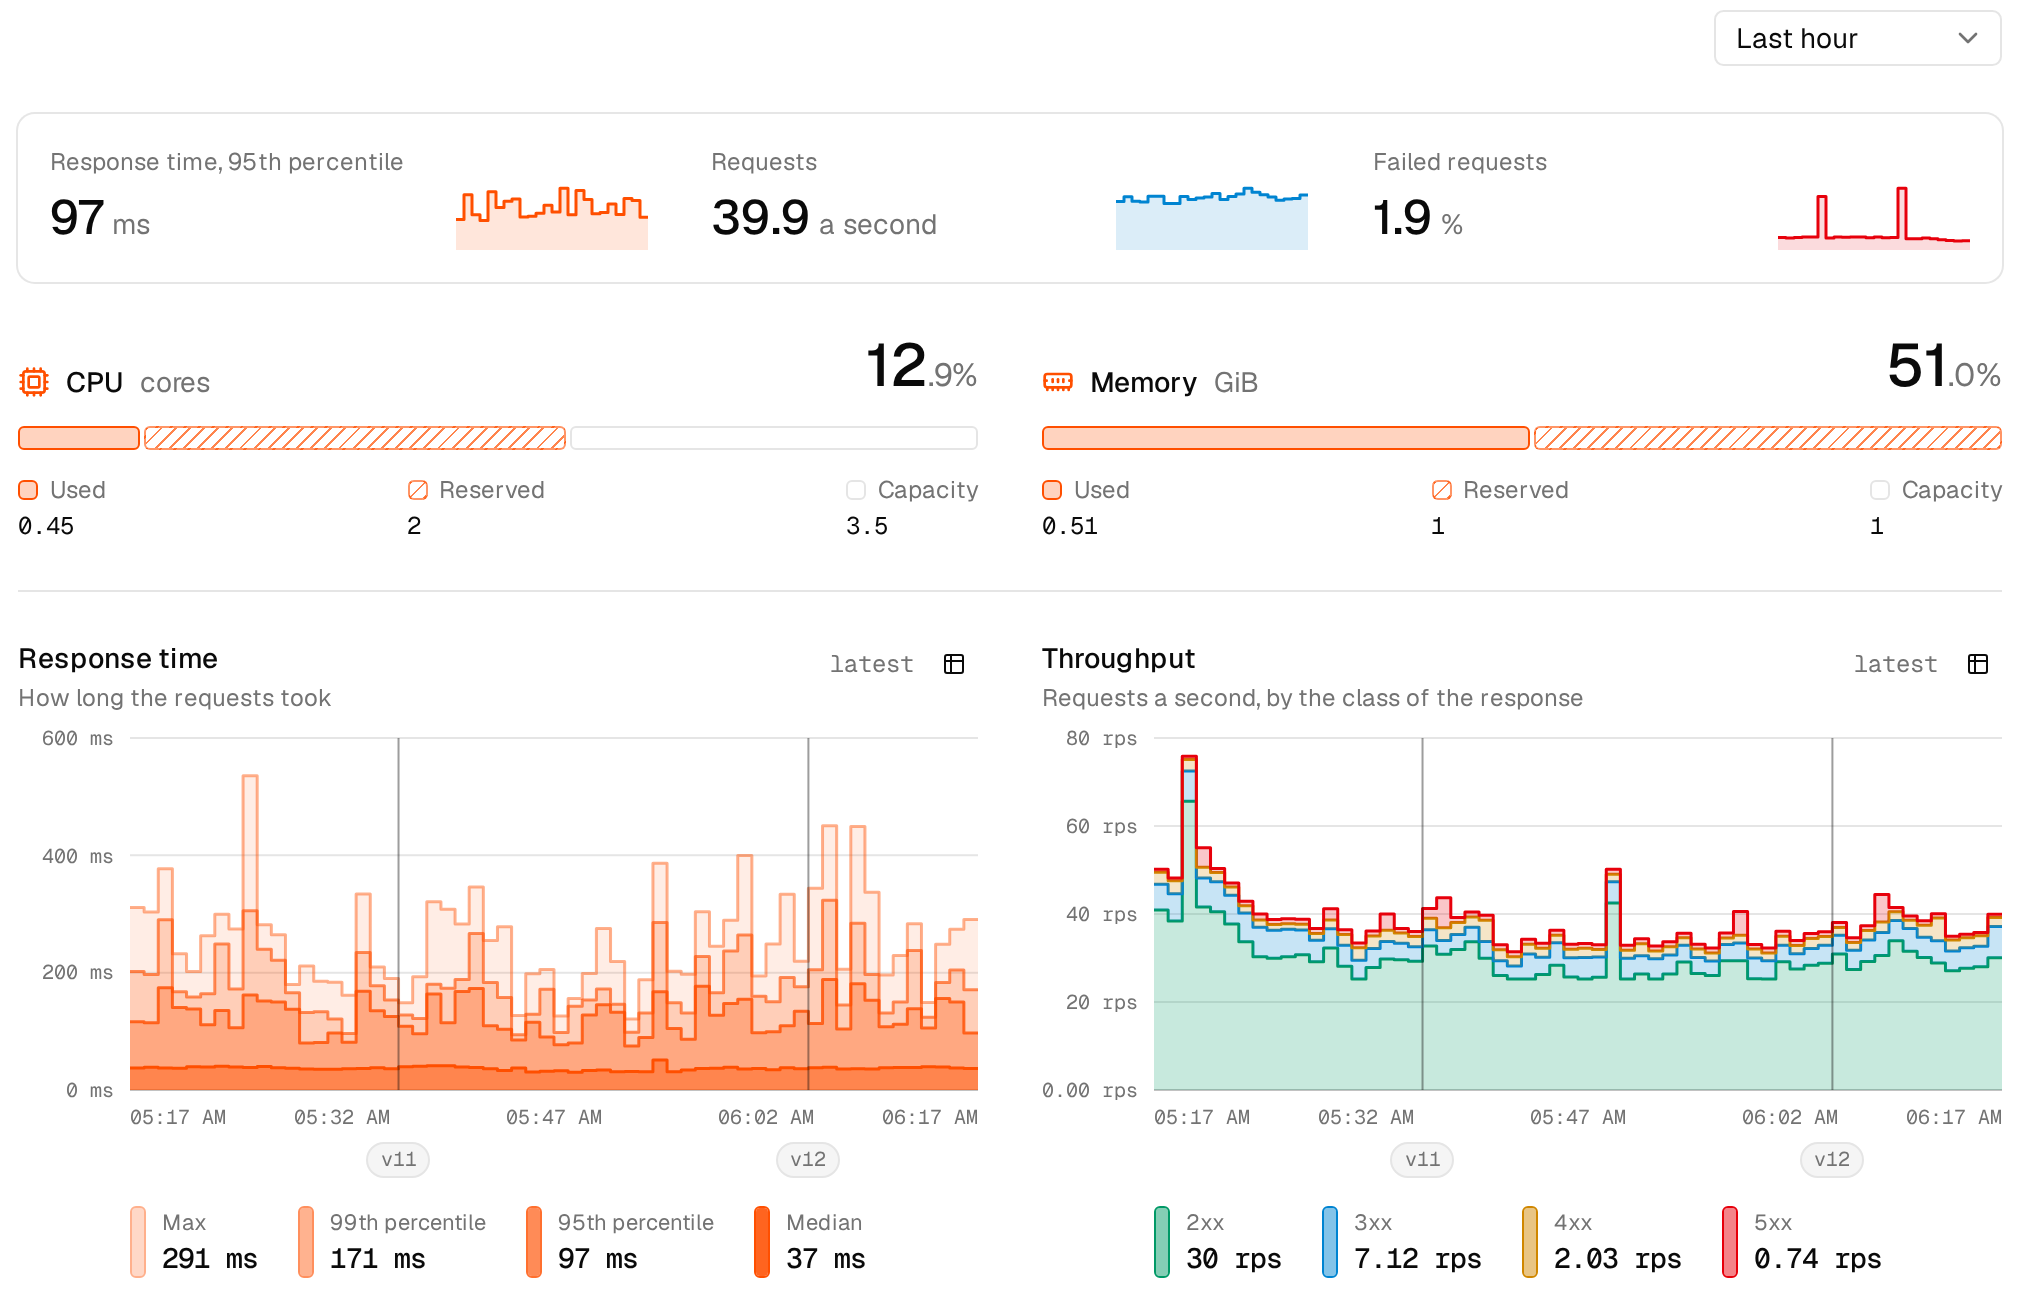
Response time, requests and failed requests at a glance, CPU and memory against what the processes reserve, then charts: response time percentiles, throughput by status class, CPU, memory, network and instances per process type. Releases are marked on the time axis. The range goes from the last hour to the last 7 days.
Logs
Every instance streamed live and named the Heroku way (web.1, web.2, worker.1), with a process filter, a level filter, a text filter, and Live to pause. Raw shows JSON lines as the app wrote them.
Config vars
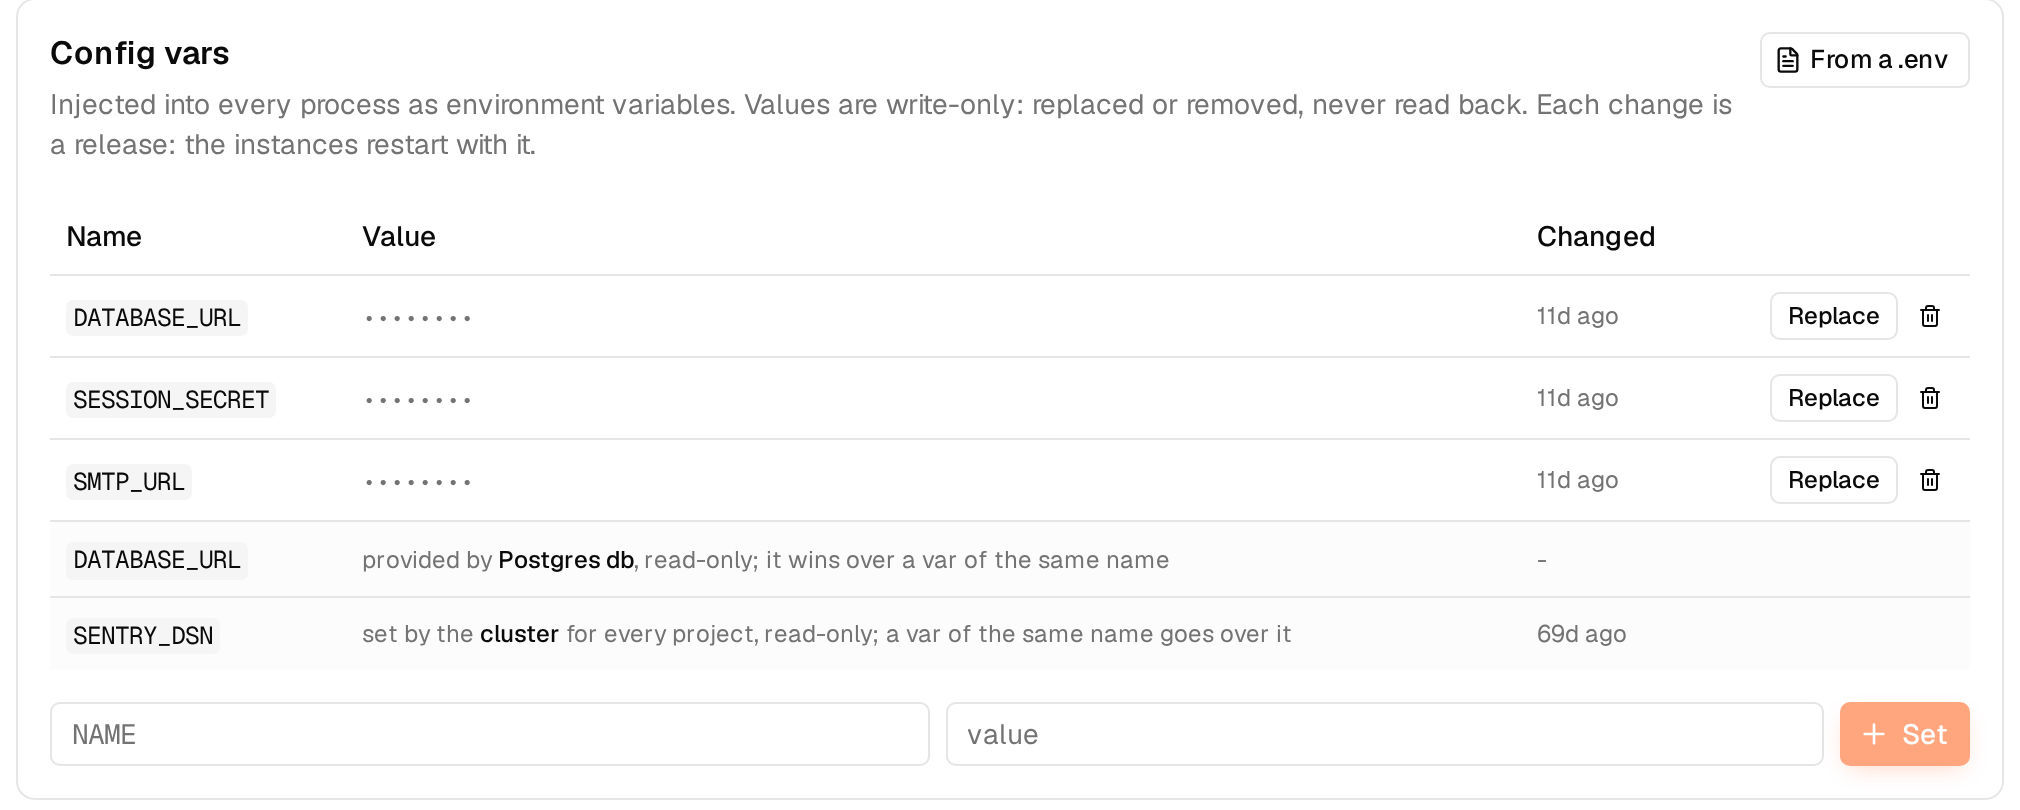
Config vars are write-only: names and when each changed are shown, values never. Each change is a release. Variables provided by attached resources (DATABASE_URL, REDIS_URL, ...) appear read-only and win over a config var of the same name; global config vars set for the whole workspace appear too. From a .env sets many at once. Below, the plain environment every process sees: PORT, SHPYRD_PROJECT, SHPYRD_RELEASE and the others.
The workspace
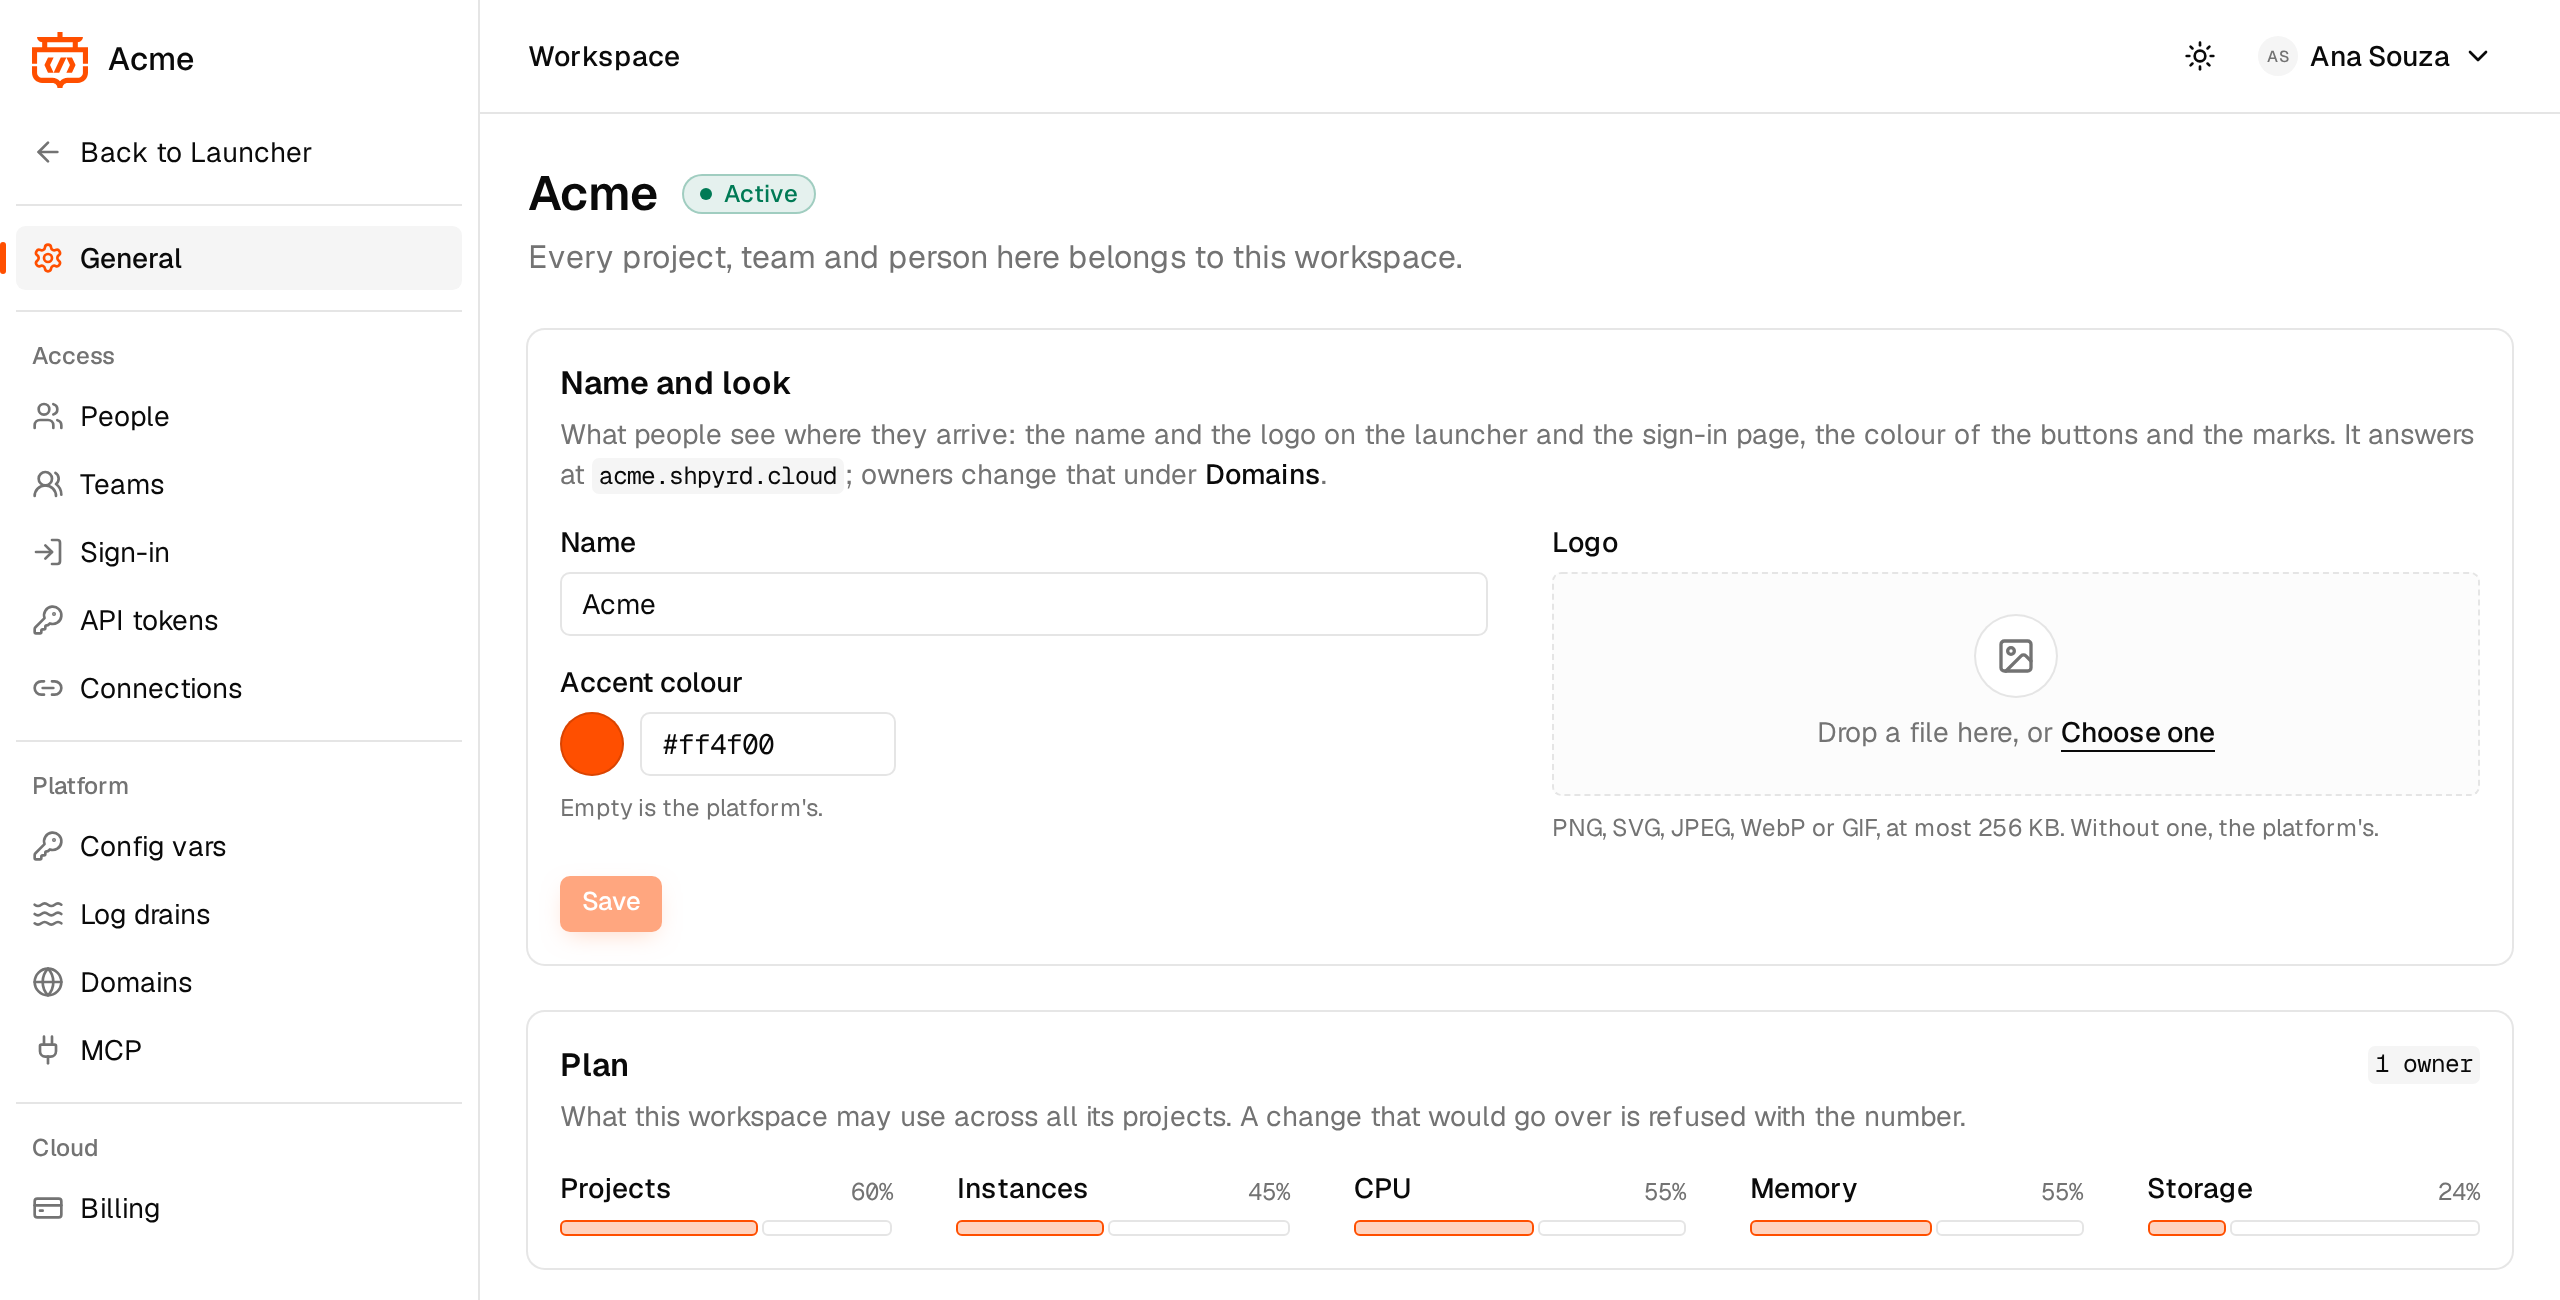
The Workspace page, for its owners and admins, also lists its pages down the side. General: the name, the look (logo and accent colour) and the plan, with what the projects use against it. Under Platform: config vars every project receives, log drains, the workspace's own domains, and MCP. On shpyrd cloud, Billing is under Cloud.
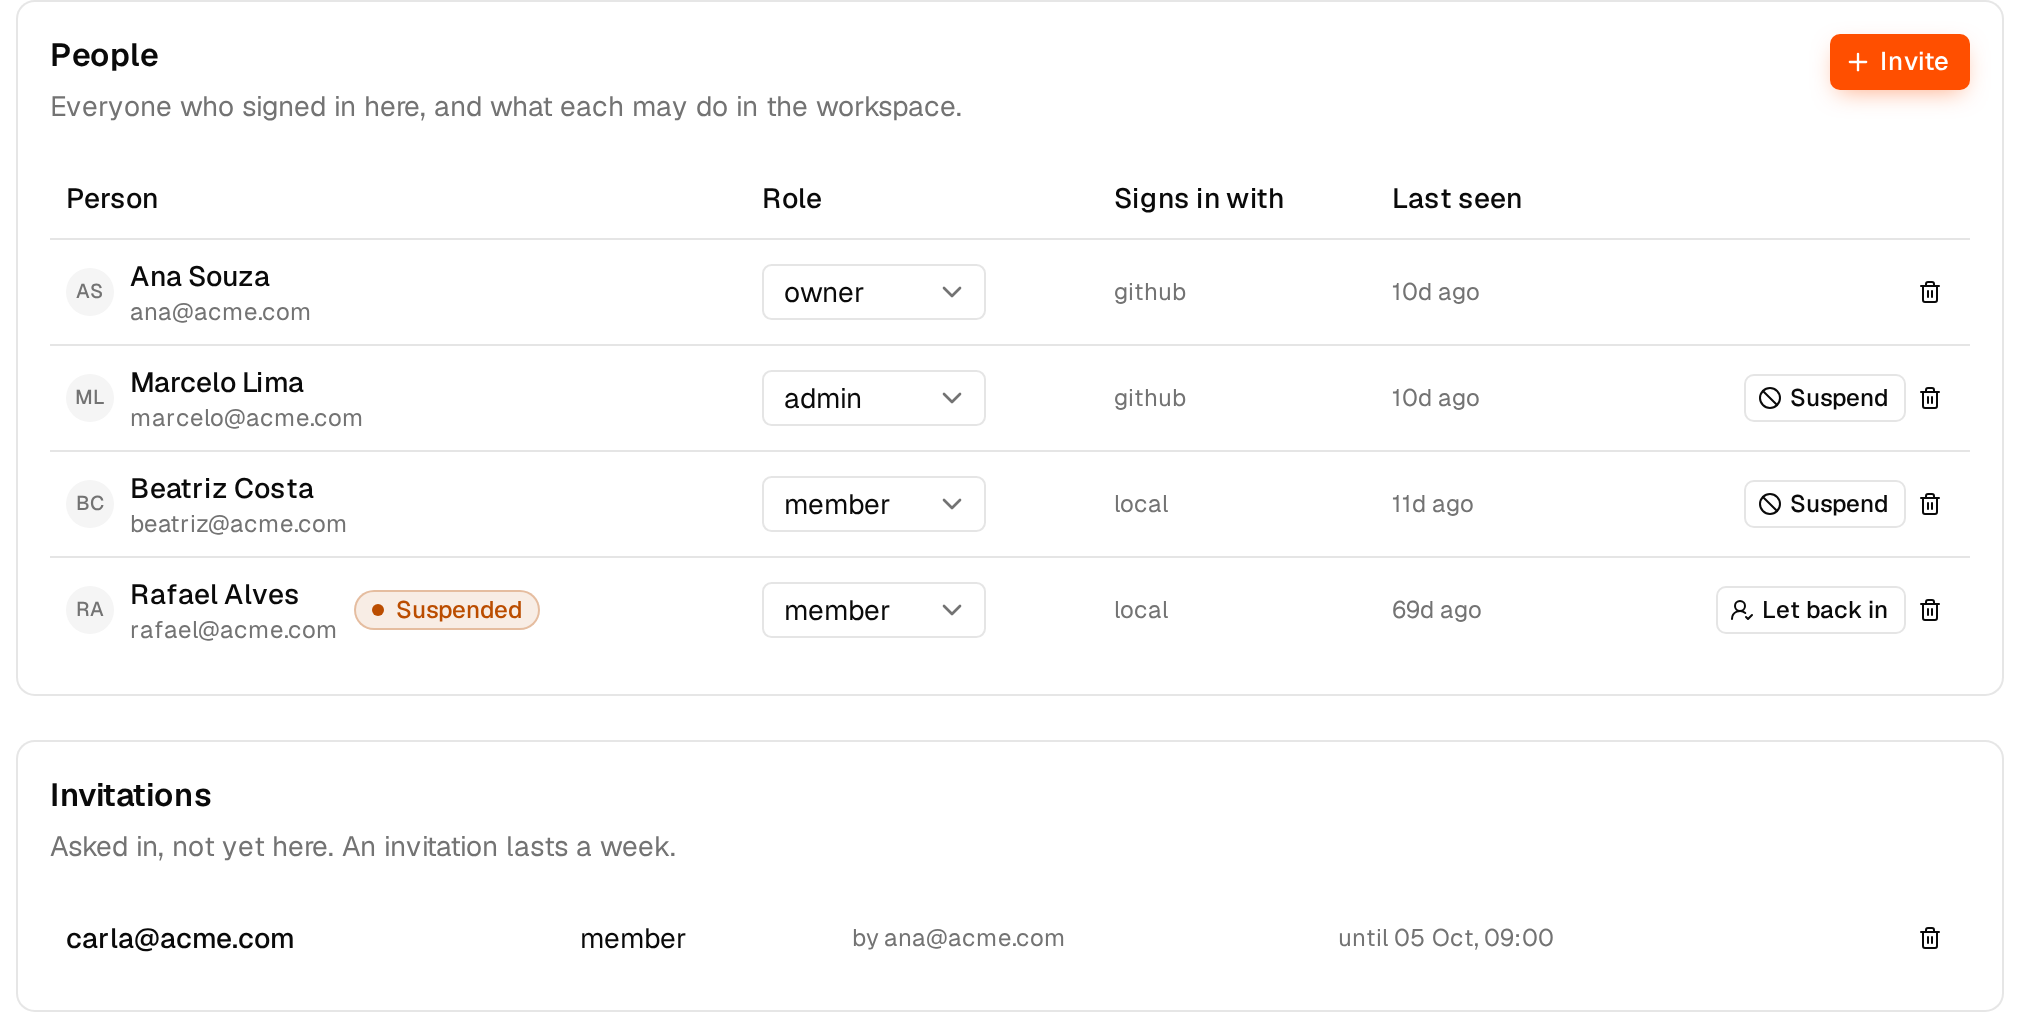
People: everyone in the workspace with their role (owner, admin, member), how they sign in and when they were last seen, Invite, the pending invitations, and Suspend when someone has to be switched off at once.
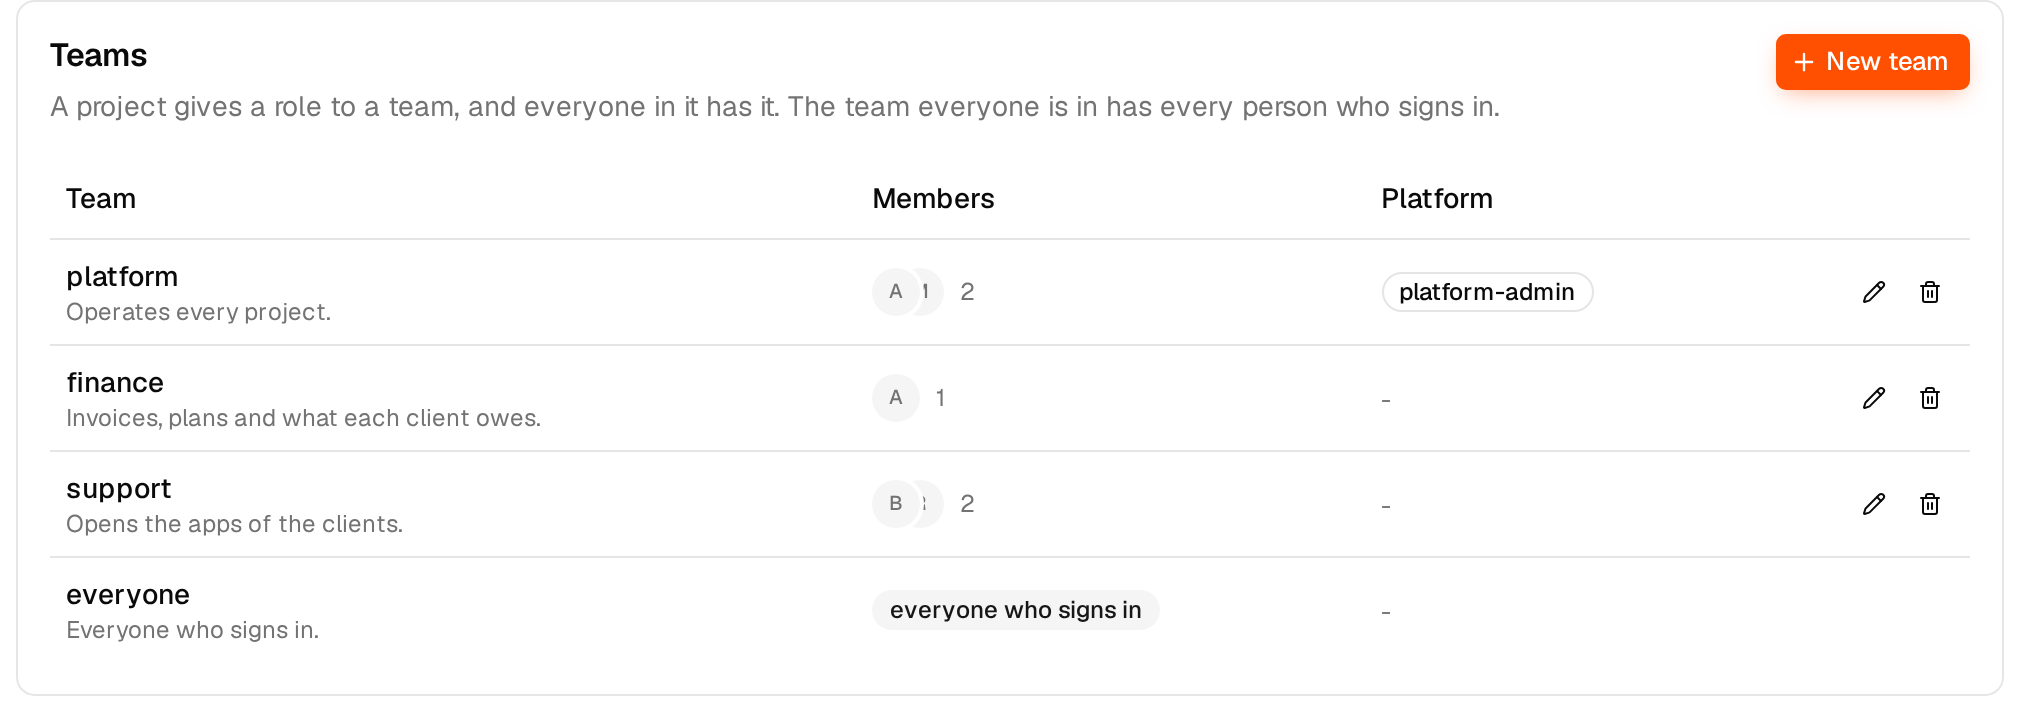
Teams group people - by email or by a group of your company's sign-in - so projects grant roles to many people at once.
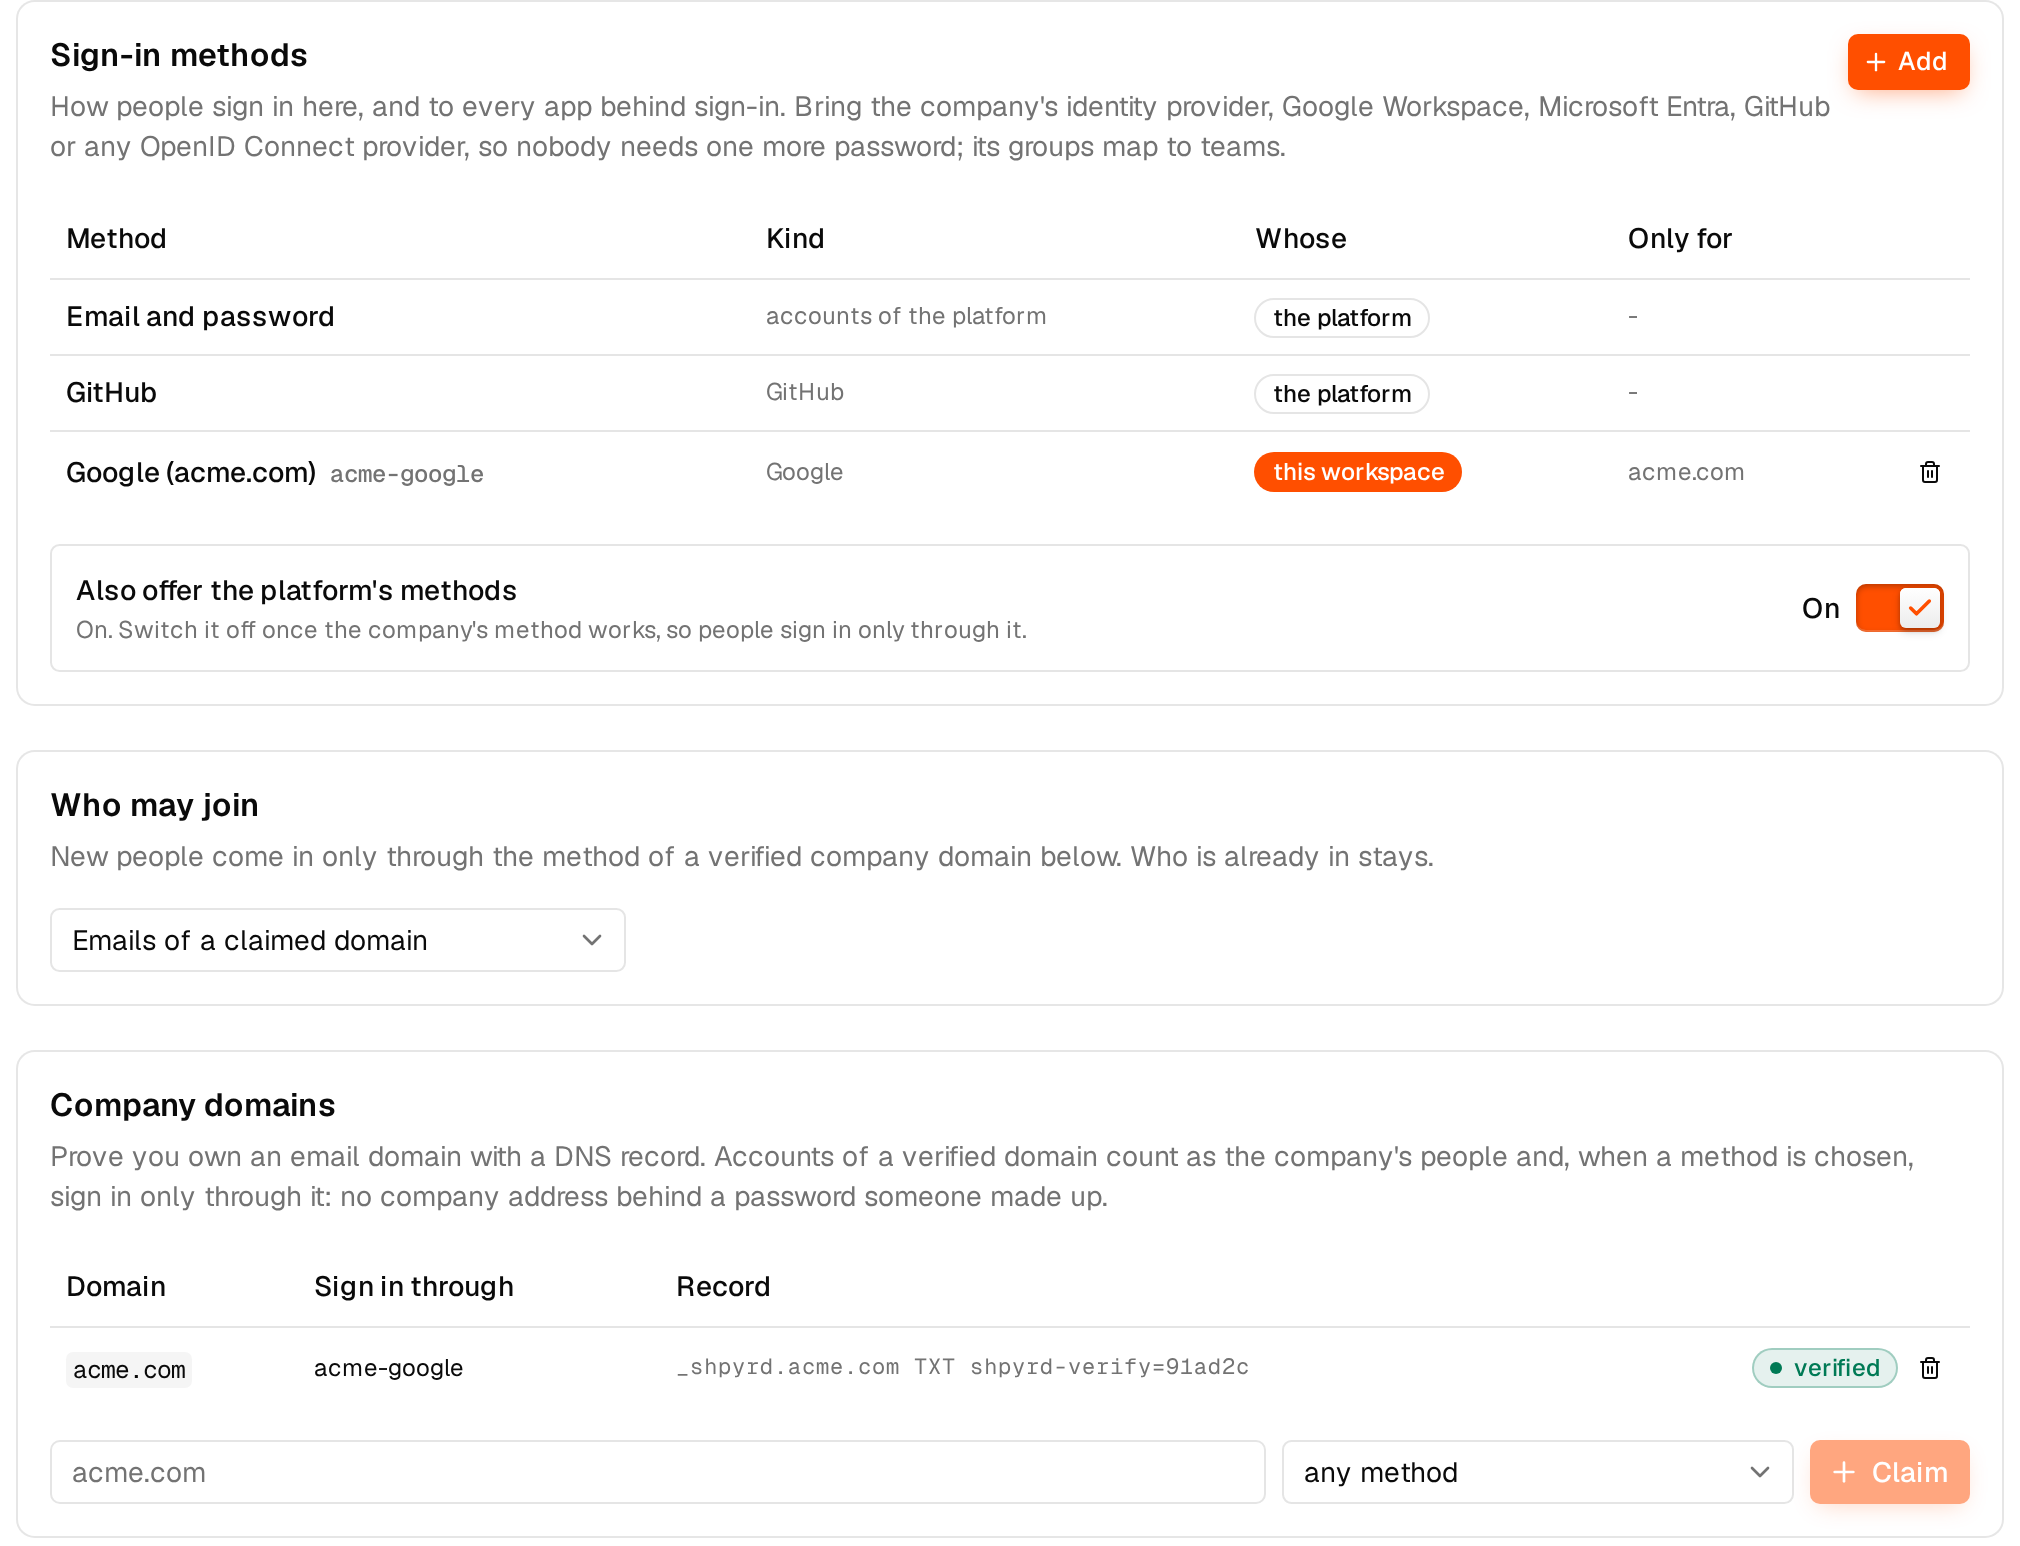
Sign-in: your company's login methods, who may join, and your company's email domains. API tokens holds the tokens for CI and scripts, and Connections the AI assistants and pipelines that act for someone.
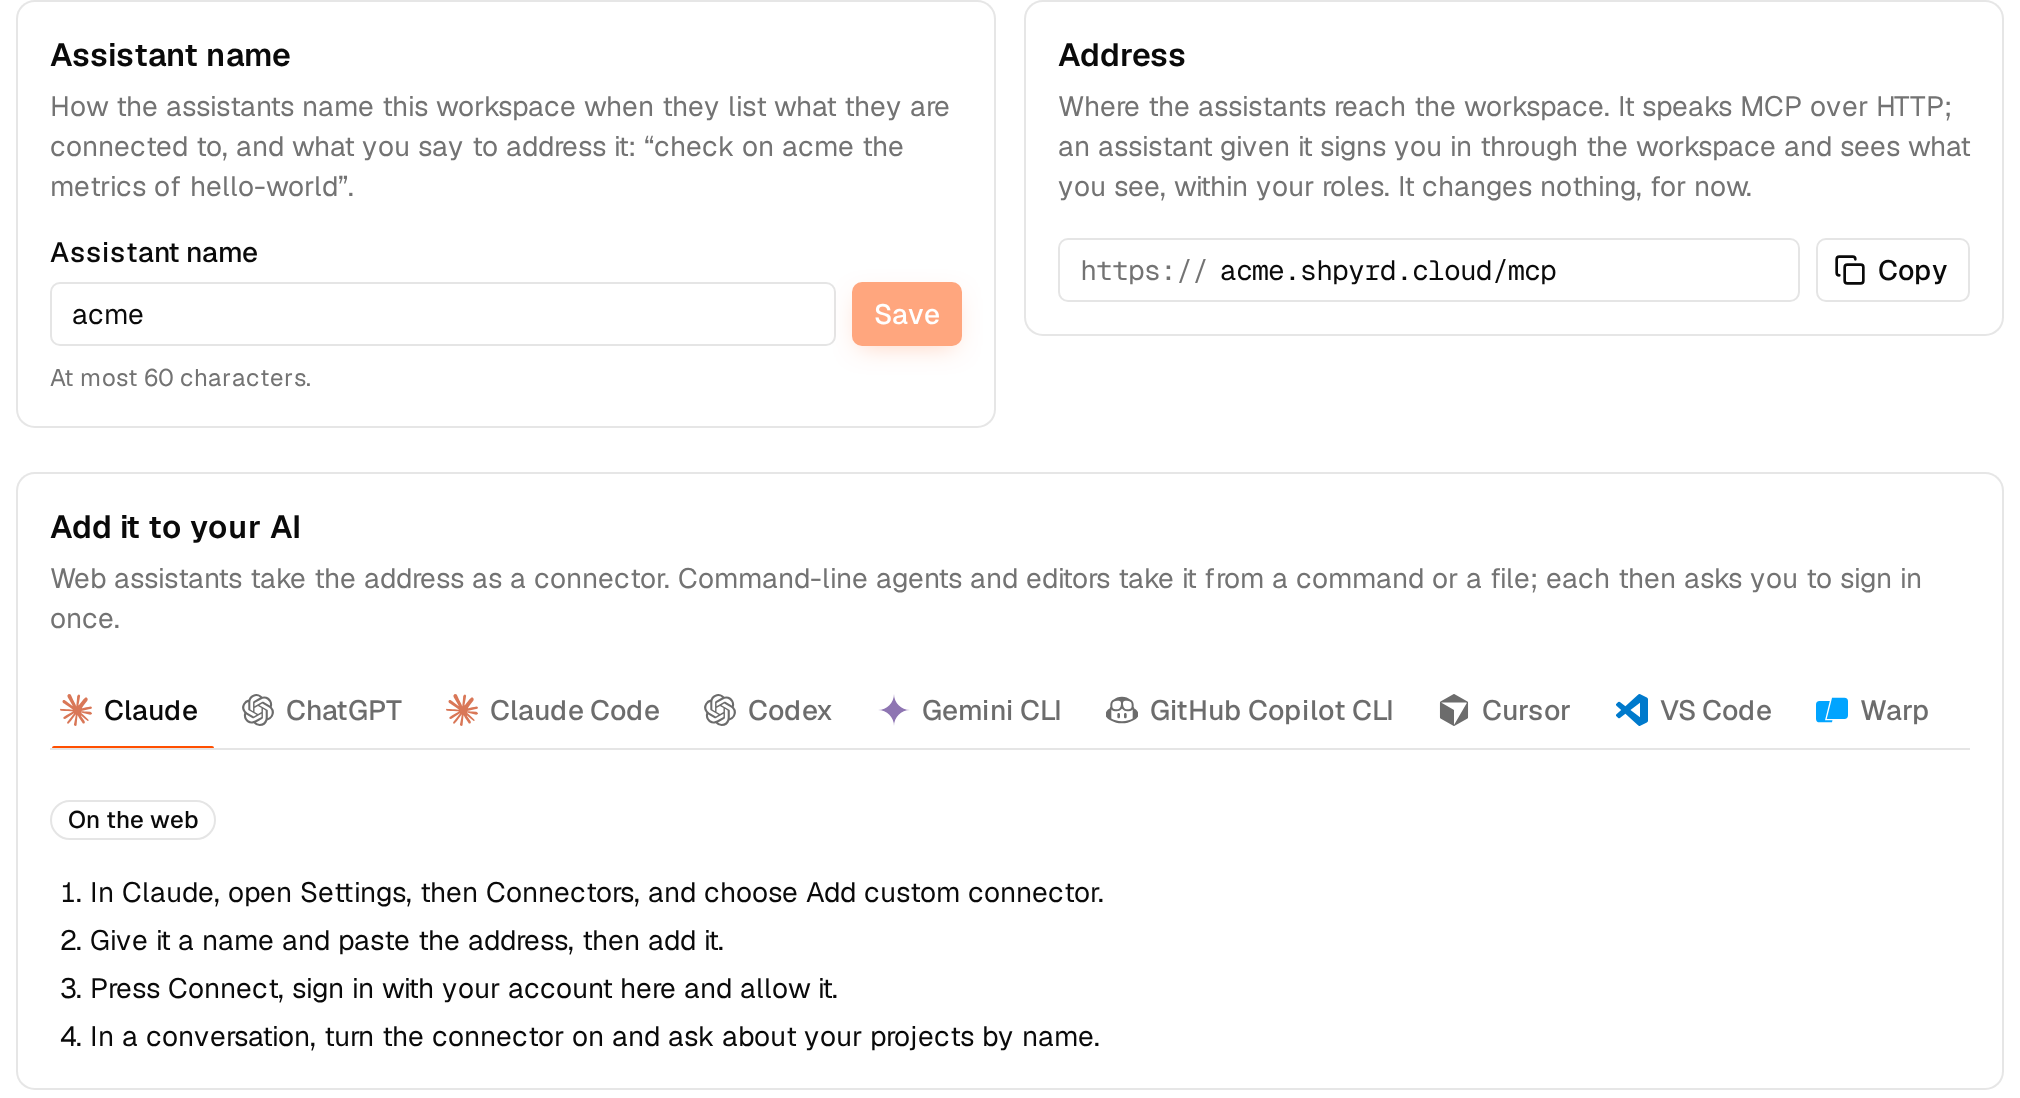
MCP: the address AI assistants connect to, the name they show, and how to add it to each one. See AI assistants (MCP).
Try it yourself
Sign in, then deploy the samples from a checkout of the repository:
shpyrd login --url https://acme.shpyrd.cloudshpyrd projects create shop --public && cd examples/shop && shpyrd deploy # a public shop; without --public visitors sign inshpyrd pg create db --project shop && shpyrd redis create cache --project shopshpyrd attach db && shpyrd attach cacheshpyrd projects create blog && shpyrd volumes create data --size 1Gi --project blog && (cd ../blog && shpyrd deploy)shpyrd projects create api && (cd ../api && shpyrd deploy)Or ask your agent to do it: "Deploy the three examples in examples/ to shpyrd."